How to Put a Leather Patch on a Hat: Heat Press Settings, Sizes and Artwork
Leather patch hats are simple to make once the settings are right. Here are heat press settings, patch sizes for common caps, material choices and how to prepare laser-ready artwork.

Embroidery Digitizing Studio
Commercial Digitizing Service
Need production-ready machine files? Explore our Vector Art for Laser and Patches
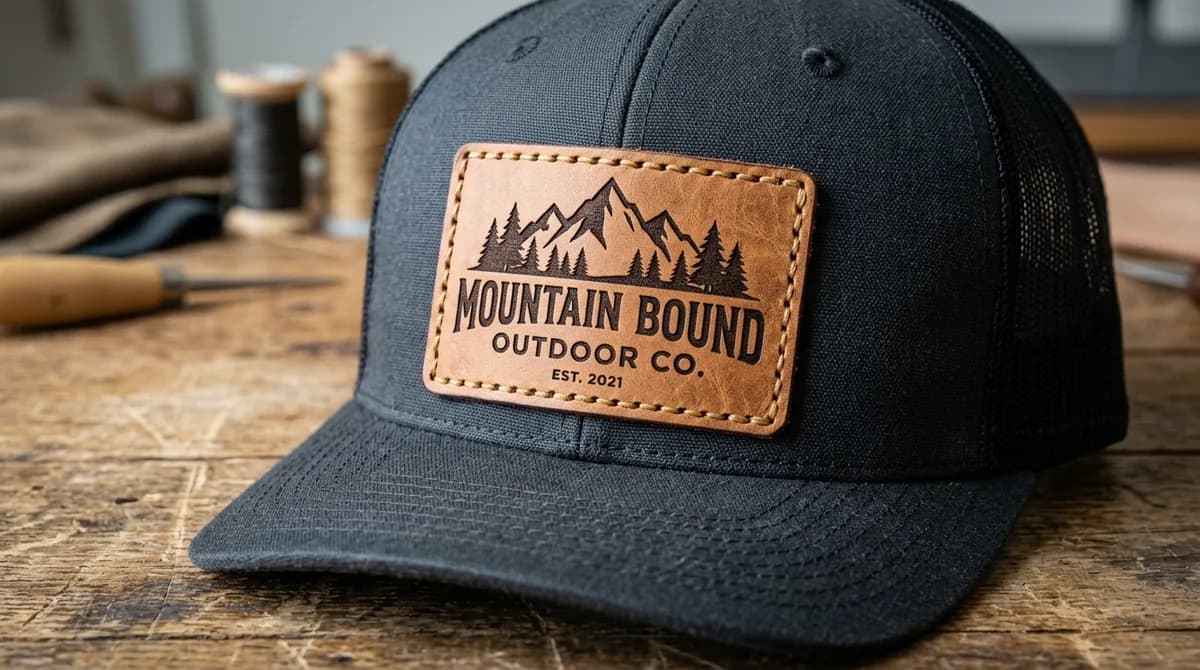
To put a leather patch on a hat, heat press an adhesive-backed patch with a curved hat press at about 280 F on top (about 320 F on the lower platen if yours is heated), medium pressure, for 15 to 30 seconds, then let the hat cool before handling. Pre-press the cap first to remove moisture, cover the patch with a Teflon sheet or silicone pad, and stitch around the edge if the hat will see sweat, rain or work wear. Always start with your patch supplier's settings and test one hat.
This guide covers press settings, patch sizes for common caps, genuine vs faux leather, and how to prepare artwork for laser engraving. We are a digitizing and vector art studio, so the artwork section is where we help most.
Heat Press Settings for Leather Hat Patches
Settings depend on the adhesive and your press. These are typical starting points from patch suppliers' published instructions; your patch maker's spec sheet takes priority.
| Setting | Dual-platen hat press | Single-platen press or cap attachment |
|---|---|---|
| Upper temperature | About 275 to 285 F | About 280 to 300 F |
| Lower temperature | About 315 to 320 F | Not heated |
| Pressure | Medium to firm | Medium to firm |
| Time | About 15 to 30 seconds | Usually longer, test in 5 second steps |
| Pre-press | About 5 seconds to remove moisture | About 5 seconds |
| Cover | Teflon sheet or silicone pad | Teflon sheet or silicone pad |
Step by Step
- 1Pull the sweatband out of the way and fit the cap snugly on the lower platen so the front panel is smooth.
- 2Pre-press for about 5 seconds to remove moisture and flatten the panel.
- 3Peel the patch liner and place the patch. A strip of heat tape keeps it from shifting.
- 4Cover with a Teflon sheet or silicone pad to protect the leather surface.
- 5Press at medium to firm pressure for the time your supplier gives.
- 6Let the hat cool before you test the edges. Adhesive bonds as it cools.
- 7If an edge lifts, press again for 5 to 10 seconds longer.
Troubleshooting Heat Pressed Leather Patches
| Problem | Likely cause | Fix |
|---|---|---|
| Edges lift after cooling | Not enough time or pressure; cap not fitted tightly on the platen | Re-press 5 to 10 seconds longer with firmer pressure |
| Patch slid while pressing | Not secured before closing the press | Use heat-resistant tape on the patch edge |
| Shiny or scorched patch surface | Too hot, or no cover sheet | Lower the temperature and use a silicone pad |
| Glue squeezing out at the edges | Too much pressure or heat | Reduce pressure and time slightly |
| Mark or press line on the cap | Platen edge pressing on the crown | Use a silicone pad and check the cap fits the platen |
| Patch falls off after washing | Adhesive alone on a hat that gets wet or sweaty | Stitch the edge, or hand wash only |
Leather Patch Sizes for Common Hats
| Shape | Typical size | Best for |
|---|---|---|
| Rectangle, rounded corners | About 2.5 to 3 in wide x 1.75 to 2 in tall | Trucker caps and structured six-panel caps |
| Circle | About 2.25 to 2.5 in across | Round emblems and seals |
| Hexagon or shield | About 2.5 in wide x 2.5 to 2.75 in tall | Outdoor and badge-style logos |
| Small rectangle | About 2 x 1.25 in | Unstructured dad hats and low-profile caps |
| Beanie cuff rectangle | About 2 to 2.5 in wide x 1.25 to 1.5 in tall | Knit beanie cuffs (sew on, do not press hot) |
Measure the front panel of your exact cap; a low-profile cap has noticeably less room than a high-crown trucker. Our hat logo size guide gives the same measurements for embroidered logos.
Heat Press or Stitch?
Heat pressing alone holds well for fashion and promotional hats. For work hats, sports teams or anything washed or soaked in sweat, stitch the edge after pressing. Stitching a patch onto a finished cap needs a cylinder-arm or post-bed machine to reach inside the crown; many shops sew the patch on before the cap is assembled, or press it and add a perimeter stitch only on the patch border. Some brands sew leather onto a twill base with a merrowed edge for a hybrid look. Compare the pros and cons in iron-on vs sew-on patches.
Genuine Leather vs Faux Leather
- Genuine leather: usually full-grain or vegetable-tanned. It can be laser engraved, debossed or hot-stamped and develops a patina with wear. Colors vary between hides and the cost is higher.
- Laserable faux leather (leatherette): a polyurethane material with a top color over a contrasting core. The laser removes the top layer for sharp two-tone results. It is consistent, water-resistant and often comes with adhesive applied, which makes it the common choice for bulk hat orders.
- Not sure leather is right? Compare embroidered, woven, PVC and leather options in our custom patch types guide.
Artwork Rules for Laser Engraved Leather Patches
Laser engraving is one color: the laser either removes material or it does not. Unlike embroidery digitizing, there are no thread colors to separate, but the artwork still has to be clean.
- 1Use vector artwork: AI, EPS, SVG or PDF, with all text converted to outlines.
- 2Keep lines at about 0.5 mm or thicker: hairlines burn away and fine detail fills in on rough leather grain.
- 3Separate engrave and cut: put the engraved artwork and the cut outline on different layers or in different colors, as your laser software expects.
- 4Check for overlapping paths: duplicate or self-intersecting shapes make the laser pass twice and burn deeper.
- 5Think in negative: on two-tone leatherette, the engraved area shows the core color. Decide whether the logo or the background should be engraved.
Leather Patch or Embroidered Logo?
Leather suits outdoor, workwear and heritage brands and reproduces fine one-color detail well. Direct embroidery or 3D puff suits bold multi-color logos and sports styles. If you are weighing the two for a cap, see the 3D puff digitizing service and flat embroidery vs 3D puff.
Velora prepares clean, laser-ready vector files from rough logos and sketches through our vector art services, and digitizes embroidered patches and cap logos through our patch digitizing service. Send your logo with the patch size and material.
Written by the Velora Digitizing Team
Digitizing StudioThis guide is written and reviewed by the digitizers at Velora Digitizing, who prepare embroidery files for caps, jackets, patches, and left chest logos every day. The advice here comes from the same stitch-path, underlay, and fabric choices we make on client orders.
Related service
Vector Art for Laser and Patches