3D Puff Embroidery Digitizing: The Complete Guide for Caps
3D puff is the raised, bold lettering you see on snapbacks and trucker caps. It looks simple but it is one of the hardest things to digitize well. This guide covers the rules that separate crisp puff from foam poking out of the edges.
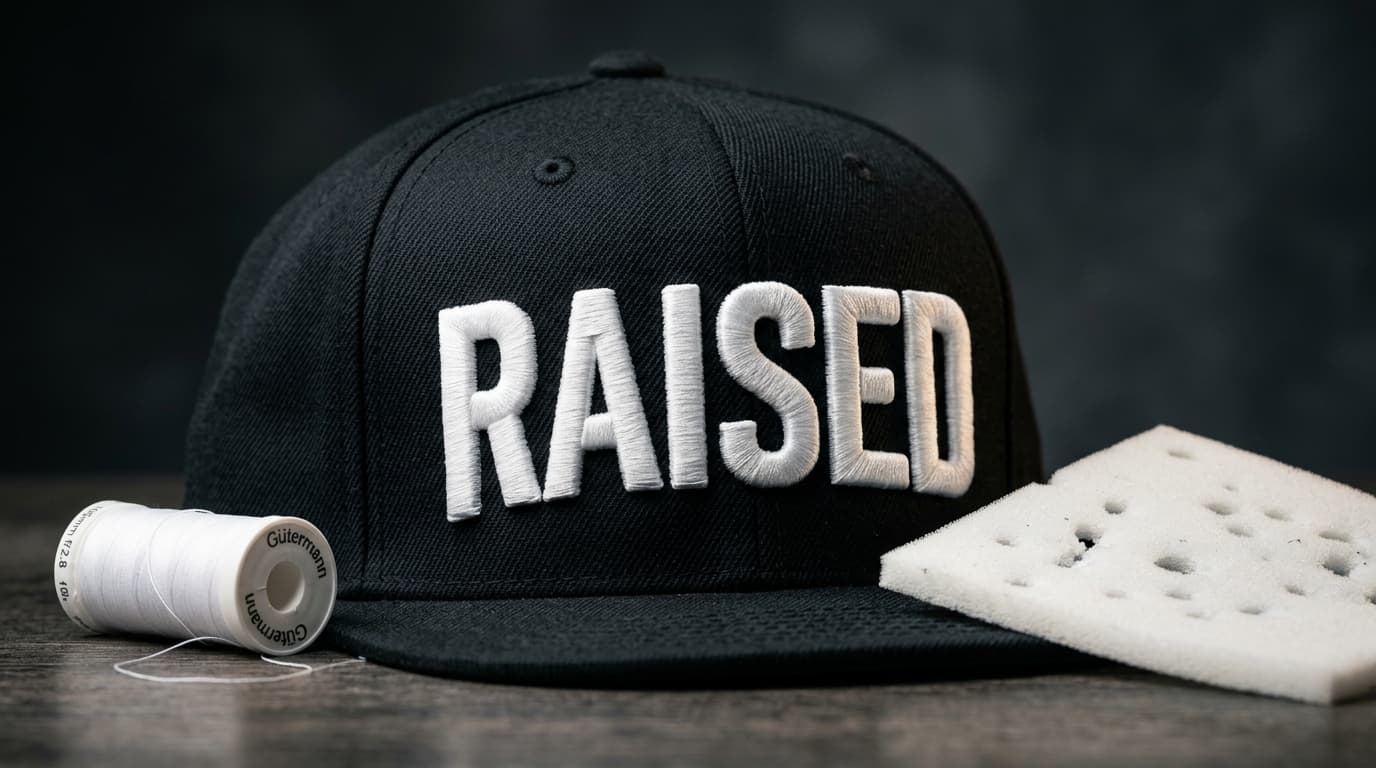
3D puff embroidery is everywhere in streetwear, sports merchandise and promotional caps. A layer of foam is placed on the cap, the machine stitches over it, and the stitches perforate the foam so the excess tears away, leaving a raised, sculpted logo. When it is digitized properly, puff looks premium. When it is not, foam shows at the edges, the letters look hollow, and the needle breaks every few hundred stitches. The difference is almost entirely in the file.
How 3D Puff Embroidery Works
The process on the machine is straightforward. The flat parts of the design sew first. The machine then stops, the operator lays a sheet of embroidery foam over the cap panel, and the puff sections sew on top of it. The satin stitches are dense enough that the needle punctures the foam along the edges of every column; after sewing, the operator tears away the excess foam and a heat gun shrinks any tiny foam remnants that remain.
Everything that makes this work happens during digitizing: the sequence has to place the foam stop at the right moment, the satin has to be dense enough to cut the foam, the ends of every letter have to be closed so foam cannot escape, and the underlay has to be removed from the puff sections because you do not want stitches flattening the foam before the satin covers it.
Which Designs Work for Puff
Puff needs width. The satin column has to be wide enough to hold the foam and narrow enough that the stitches do not snag. In practice that means:
- Satin columns between roughly 3 mm and 12 mm wide. Below 3 mm the foam has nothing to sit under; above 12 mm the stitches become too long and loop or pull.
- Bold, blocky fonts. Varsity, collegiate, heavy sans-serif and rounded fonts are ideal. Script and serif fonts usually need to be thickened first.
- Simple shapes with clean outlines. Stars, shields, initials, numbers and mascots with bold outlines all puff well.
- No gradients, no fine detail inside the puff area. Details are added as flat embroidery on top or beside the puff.
Most professional cap logos combine both: the main letters in 3D puff and the tagline, outline or small elements in flat embroidery. This gives the raised effect where it counts and keeps small text readable.
Digitizing Rules for Clean Puff
Remove underlay from the puff sections
Standard satin gets an edge-walk or centre-walk underlay to stabilise the fabric. On puff sections that underlay would pin the foam down before the top stitches cover it. Puff satin is digitized with no underlay, or at most a very light centre run, so the foam keeps its full height.
Increase satin density
Flat satin on a cap usually sits around 0.40 mm spacing. Puff satin needs to be tighter, typically 0.30 to 0.35 mm, so the stitches perforate the foam cleanly along the edges and cover the top completely with no foam showing between stitches. The exact value depends on foam thickness and thread weight.
Cap the ends of every column
Where a satin column ends, foam would normally stick out of the open end. Digitizers close each end with a few short perpendicular stitches, often called capping or end-capping, that cut the foam across the end of the column. Missing caps are the most common reason for foam showing on finished caps.
Add pull compensation, but less than usual
Foam pushes back against the thread, so puff columns tend to sew slightly wider than digitized rather than narrower. Digitizers use lower pull compensation on puff than on flat satin, and they test-sew to confirm the letters are not bloating.
Sequence flat first, puff last
All flat embroidery sews first, then the machine stops for foam placement, then the puff sections sew from the centre of the cap outward. Sewing puff last stops the flat elements from being sewn through foam, and centre-out ordering keeps the cap panel from shifting on the curved frame.
Foam Thickness and Color
2 mm foam is the everyday choice and works for most cap logos. 3 mm foam gives a bolder, more sculpted look but requires wider columns, higher density and a slower machine speed. Foam color should match the thread color as closely as possible; if a tiny piece of foam stays behind after tearing away, matching foam makes it invisible. White foam under navy thread will show.
Machine Setup Tips for Operators
- Slow the machine to 600 to 700 stitches per minute for puff sections. High speed heats the needle and melts the foam.
- Use a sharp 75/11 or 80/12 needle. Ballpoint needles push the foam instead of cutting it.
- Loosen the top tension slightly so the thread sits on top of the foam rather than crushing it.
- Keep the foam flat and taut over the panel, and hold it steady during the first few stitches.
- After tearing away, use a heat gun on low for a second or two to shrink remaining foam fibres.
Common 3D Puff Problems and Their Causes
- Foam visible at edges: density too low or missing end caps.
- Hollow, sunken letters: underlay left on, or foam too thin for the column width.
- Thread breaks every few hundred stitches: density too high, needle too dull or machine too fast.
- Letters look bloated: pull compensation too high for foam.
- Flat details distorted: puff sewn before flat elements, or foam left under the flat sections.
Get Your Cap Logo Digitized for Puff
Puff is unforgiving. A file that works for flat embroidery will fail on foam, and most auto-digitized files fail immediately. Our 3D puff digitizing service sets up every design with the right density, capping and sequencing, and we test-sew every puff file on a structured cap before delivery. You can see finished examples in the 3D puff section of our portfolio, or send your logo through the contact page for a free quote.
Related service
3D Puff Digitizing Service