Embroidery Machine Thread Tension: How to Check and Adjust It
Balanced tension makes embroidery smooth on top and neat underneath. Here is how to test it with the one-third rule and fix the most common tension problems.

Embroidery Digitizing Studio
Commercial Digitizing Service
Need production-ready machine files? Explore our Custom Embroidery Digitizing
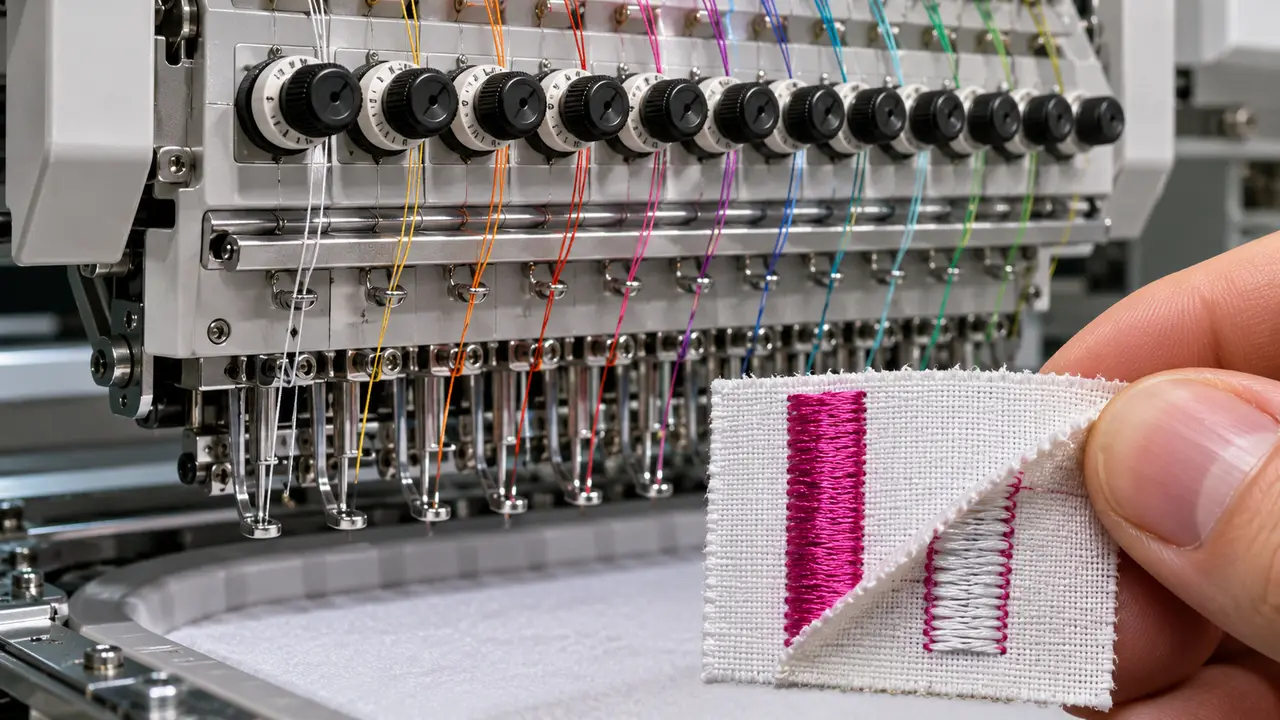
Embroidery machine thread tension is balanced when the top thread and bobbin thread meet just under the fabric. The easiest test is the one-third rule: stitch a satin column, turn it over and look for white bobbin thread covering about the middle third, with the top color on each side. Set the bobbin tension first, then adjust each top tension until the back looks like that.
This guide explains how to test, adjust and troubleshoot tension on single and multi-needle machines. Tension problems are often confused with file problems; a clean file from our digitizing team rules the design out.
How Embroidery Tension Works
Each stitch is a tug-of-war between the top thread and the bobbin thread. When the top tension is tighter, the bobbin gets pulled up and shows on the surface. When the top tension is looser, the top thread loops and the bobbin pulls it to the back. Balanced tension keeps the lock point hidden and the stitches smooth.
The One-Third Bobbin Test
- 1Hoop a scrap of medium woven fabric with a medium cutaway or tearaway stabilizer.
- 2Stitch a test design with a satin column about 5 mm wide for each needle in use (a simple capital "I" or "H" works well).
- 3Turn the swatch over and look at each column.
- 4Balanced: bobbin covers about the center third.
- 5Top too tight: bobbin covers much more than a third, or shows on top.
- 6Top too loose: little or no bobbin showing on the back, loops on top.
| What you see on the back of a satin column | What it means | What to change |
|---|---|---|
| White bobbin covers about the middle third, top color on each side | Balanced | Nothing |
| Bobbin covers much more than a third, or shows on the front | Top tension too tight, or bobbin too loose | Loosen the top tension, then check the bobbin |
| Little or no bobbin visible; top color across the whole back | Top tension too loose, or bobbin too tight | Tighten the top tension, then check the bobbin |
| One needle wrong, the others balanced | A threading or tension problem on that needle only | Rethread and adjust that needle |
How to Adjust Top Thread Tension
- Turn the tension knob clockwise to tighten and counterclockwise to loosen, in small steps.
- Rethread before adjusting; a missed guide changes tension more than any knob.
- Pull the thread through the needle by hand; it should feel smooth with light, even resistance.
- Re-run the test and compare.
How to Adjust Bobbin Tension
- Clean lint from the bobbin case and hook area first.
- Use a bobbin tension gauge if you have one, or the drop test your manual recommends.
- Turn the small screw on the bobbin case in tiny increments.
- Use the same bobbin type and brand consistently; switching changes tension.
Common Tension Problems and Fixes
| Problem | Likely cause | Fix |
|---|---|---|
| Bobbin thread showing on top | Top tension too tight or bobbin too loose | Loosen the top tension, check the bobbin, rethread, clean the bobbin case |
| Loops on top of the design | Top tension too loose or thread out of the tension discs | Rethread so the thread seats in the discs, then tighten slightly |
| Birdnesting under the fabric | A missed thread guide or take-up lever | Rethread the whole path with the presser foot up |
| Thread breaks | Top tension too tight, a worn needle or a dense design | Loosen slightly, change the needle, check the design |
| Puckering around the design | Tension too tight or stabilizer too light | Loosen the tension and use a firmer backing |
When It Is Not Tension: Check the Design
If tension looks balanced on a test but one design still loops, breaks or puckers, the file may be the cause: density too high, stacked layers, columns too wide or missing underlay. Read common digitizing mistakes, embroidery underlay types and the satin stitch guide.
Running a new multi-needle machine? Start every session with a tension test. If your files cause trouble even with balanced tension, send them to us for a check or new digitizing; see digitizing prices.
Written by the Velora Digitizing Team
Digitizing StudioThis guide is written and reviewed by the digitizers at Velora Digitizing, who prepare embroidery files for caps, jackets, patches, and left chest logos every day. The advice here comes from the same stitch-path, underlay, and fabric choices we make on client orders.
Related service
Custom Embroidery Digitizing